The best market organizers have figured out that a streamlined, professional application process does three important things: it attracts better vendors, filters out poor fits early, and sets the tone for a smooth vendor relationship before the first event even starts.
In this guide, we'll walk through exactly how to structure a vendor application process that's efficient for you and impressive to vendors, from the moment they discover your market to the day they receive their booth assignment.
Step 1: Define What You Actually Need From Vendors
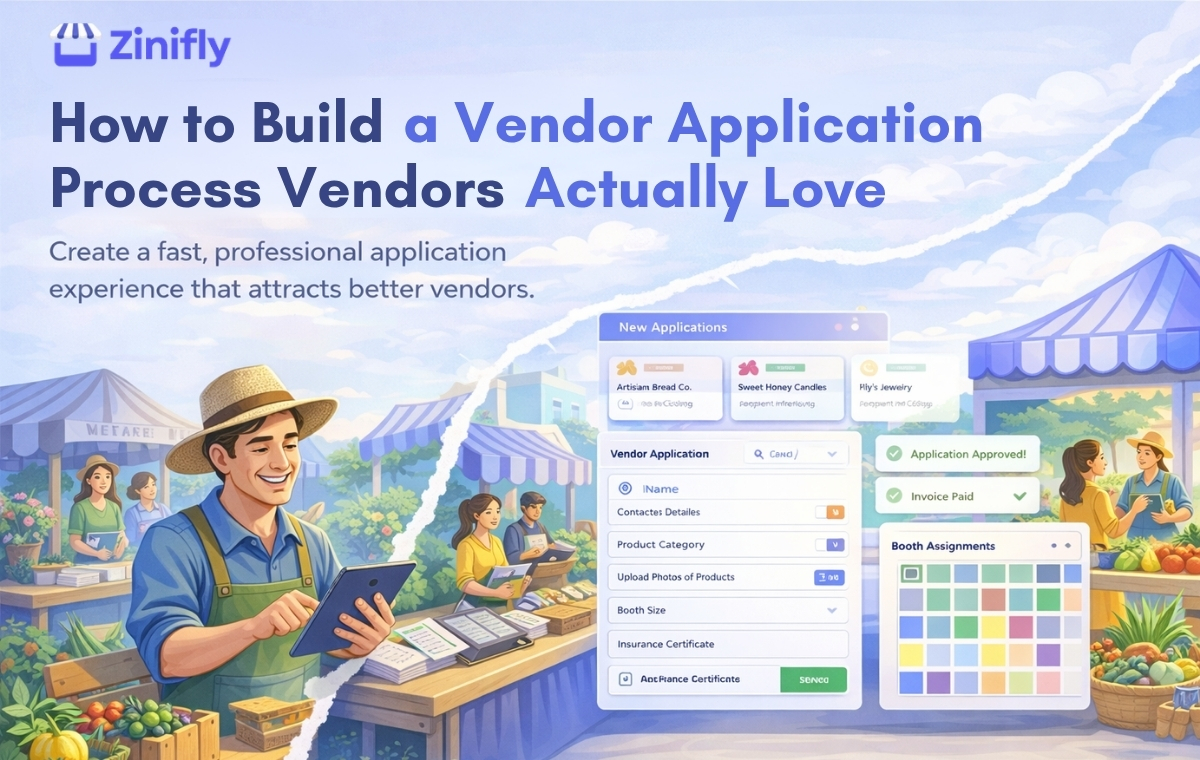
Before you build a single form, be crystal clear about what information you need to make a good decision. Most organizers ask for too little (making decisions based on gut feeling) or too much (overwhelming vendors with 40-question applications).
The core information every vendor application should capture:
- Business name, contact information, and social media links
- Product category and detailed description of what they sell
- Photos of their products and booth setup
- Booth size requirements and any special needs (power, water, etc.)
- Business license or tax ID (for compliance)
- Certificate of insurance (for liability coverage)
- Any required permits (health permits for food vendors)
- Preferred event dates or seasons
Optional but valuable additions:
- Years of experience as a vendor
- References from other markets
- Whether they produce their own goods (for juried markets)
- Website or online shop links
PRO TIP: Structure your application so vendors can complete it in under 15 minutes. Every additional minute you require increases abandonment rates. Collect only what you'll actually use to make your decision.
Step 2: Create a Consistent Review and Approval Process
One of the biggest problems in manual application management is inconsistency. When applications trickle in via email over weeks, your decisions at the beginning of the cycle often differ from decisions at the end, because your needs have changed or you've forgotten what you already approved.
A structured review process prevents this:
- Set a clear application window, a defined open and close date rather than rolling admissions
- Review all applications together after the window closes so you can compare vendors against each other
- Use consistent evaluation criteria for each category (product quality, booth presentation, market fit, compliance documents)
- If running a juried market, use a scoring rubric so decisions are objective and defensible
- Communicate decisions on a defined timeline, vendors who've applied should hear back within 7–14 days
Speed and consistency in your review process builds trust. Vendors talk to each other. Markets with slow, inconsistent processes develop reputations that make it harder to attract quality vendors over time.
Step 3: Automate What Happens After Approval
The approval is just the beginning of the vendor onboarding process. What happens next determines how ready your vendors actually are on event day. A good onboarding flow covers:
Immediate Acceptance Confirmation
The moment you approve a vendor, they should receive a professional acceptance email with clear next steps. This confirmation should include what they've been approved for, what their booth fee is, the payment deadline, and what documentation is still needed.
Invoice and Payment Collection
An invoice should go out automatically with the acceptance confirmation. Vendor booth fees should be payable online via credit card or ACH, not by mailing a check or Venmoing you. The easier you make payment, the faster you collect.
Set automatic payment reminders for unpaid invoices at 7, 14, and 21 days out. This eliminates the awkward manual chasing most organizers dread.
Document Collection
After payment is confirmed, request any outstanding documents through a structured upload process, not email attachments. Each document should have a clear due date, and the vendor should receive an automatic confirmation when their document is received and approved.
Vendor Portal Access
Give approved vendors access to a self-serve portal where they can manage their own information, review upcoming events they're registered for, see their payment history, and update their contact details. This dramatically reduces the number of repetitive questions you answer.
Zinifly's vendor management system handles the entire application-to-onboarding flow automatically. Vendors apply online, you approve with one click, invoices are generated instantly, documents are collected through the portal, and vendors manage their own information in a self-serve dashboard — all without a single spreadsheet.
Step 4: Set Clear Expectations Before the First Event
The #1 cause of vendor friction on event day is misaligned expectations set during the application process. Here's what to communicate clearly before they ever set up their booth:
- Setup windows — exact times they're expected to arrive and complete setup
- Booth dimensions and what's included (tables, chairs, electricity, tent weights)
- Rules and restrictions (product exclusivity, signage requirements, noise limits)
- Load-in procedures — which entrance to use, where to park their vehicle
- Point of contact for day-of questions
- Cancellation and refund policies
Send this information via email, and make it available in the vendor portal so they can reference it at any time. Vendors who feel well-prepared show up on time, set up efficiently, and focus on selling instead of scrambling.
Step 5: Collect Feedback and Improve Each Cycle
The best application processes evolve. After each event season, send vendors a short survey asking:
- How easy was the application process to complete?
- How clear was the communication leading up to the event?
- What information do you wish you'd received earlier?
- What would make the registration process easier next time?
Use this feedback to remove friction from the next cycle. Markets that continuously improve their vendor experience retain more vendors year-over-year, spend less time recruiting, and build word-of-mouth reputations that attract quality applicants without advertising.
What a Great Application Process Looks Like End-to-End
To recap, here's the complete flow for a modern, vendor-friendly application process:
- Vendor discovers your market and finds a clear, professional online application
- They complete the application in under 15 minutes with product photos and basic info
- Application goes into your dashboard with all submissions organized for review
- You review all applications during a defined window and approve/decline/waitlist
- Approved vendors receive instant confirmation with invoice and next steps
- Payment is collected online automatically, with reminders sent to those who haven't paid
- Required documents are uploaded through a structured portal and tracked automatically
- Booth assignment is shared with the vendor along with pre-event instructions
- Vendors access their own portal to review their information and upcoming events
- Post-event feedback is collected to improve the next cycle